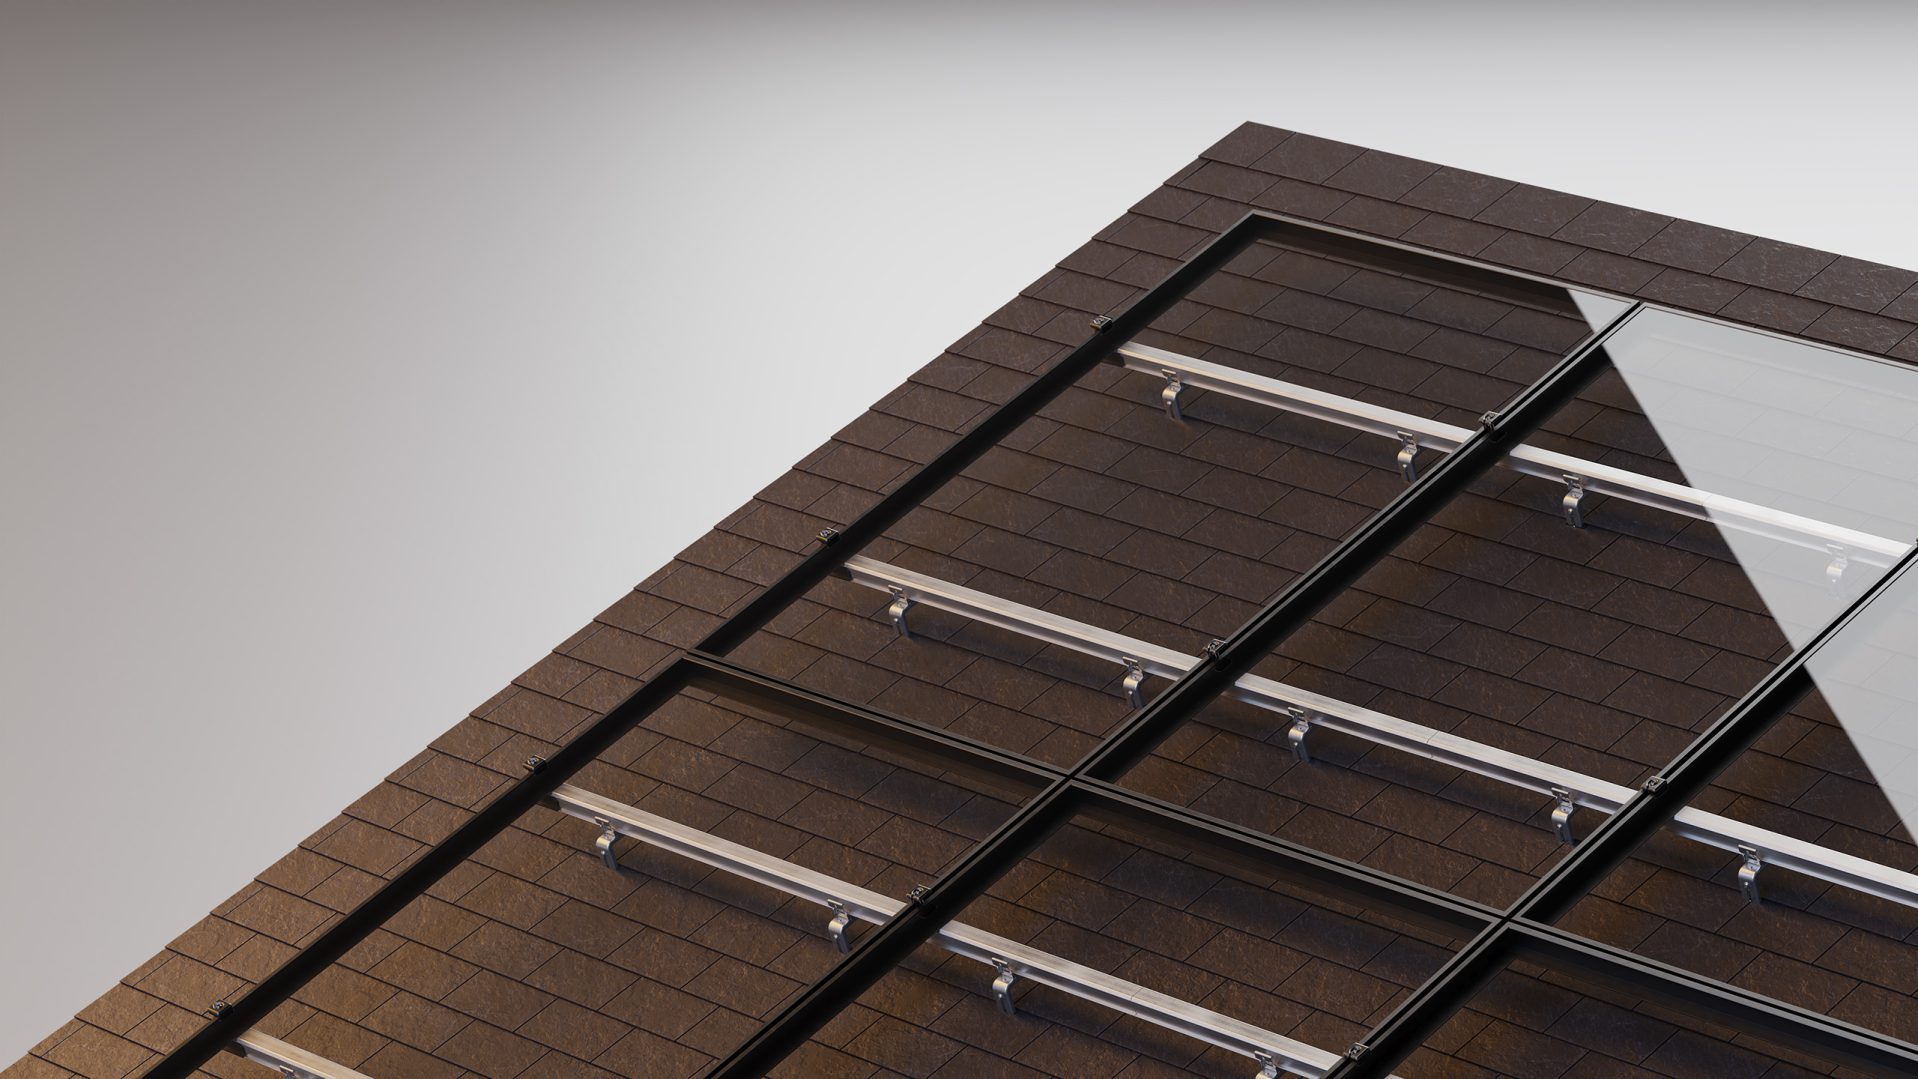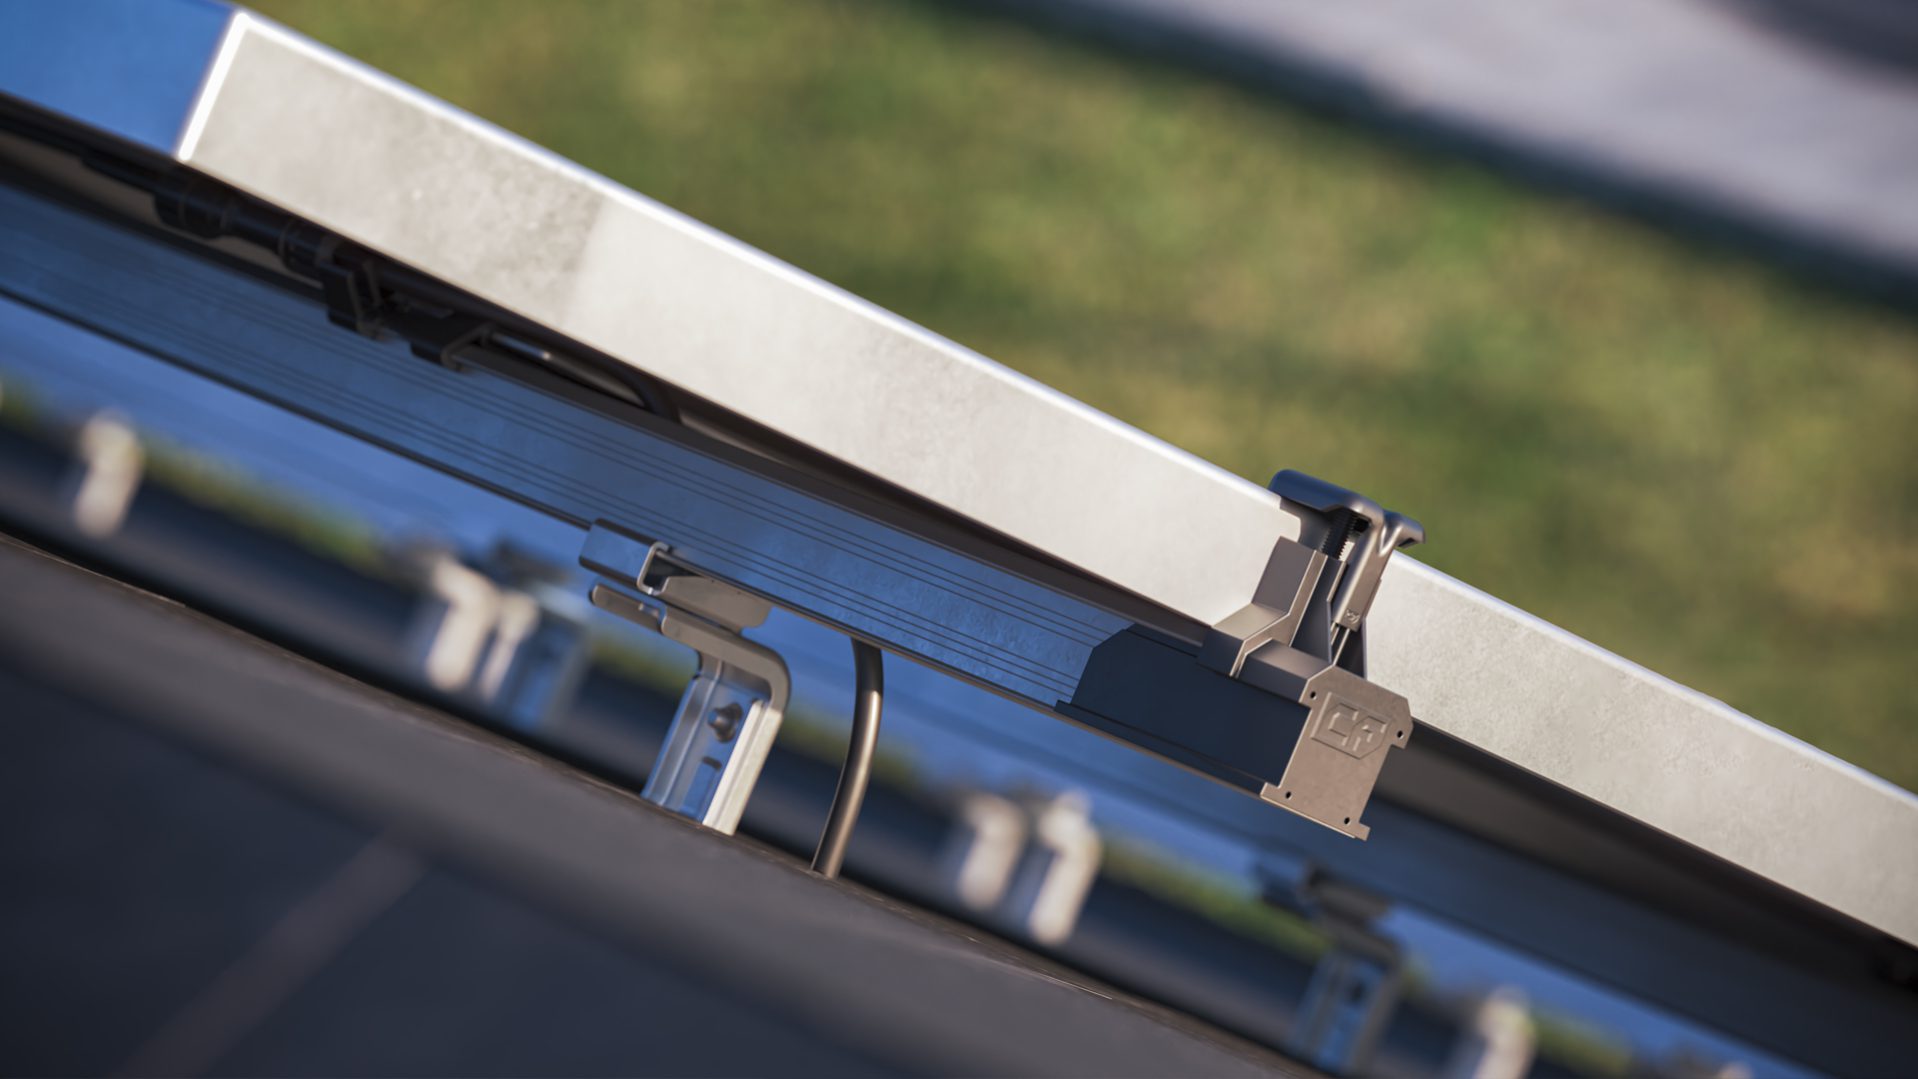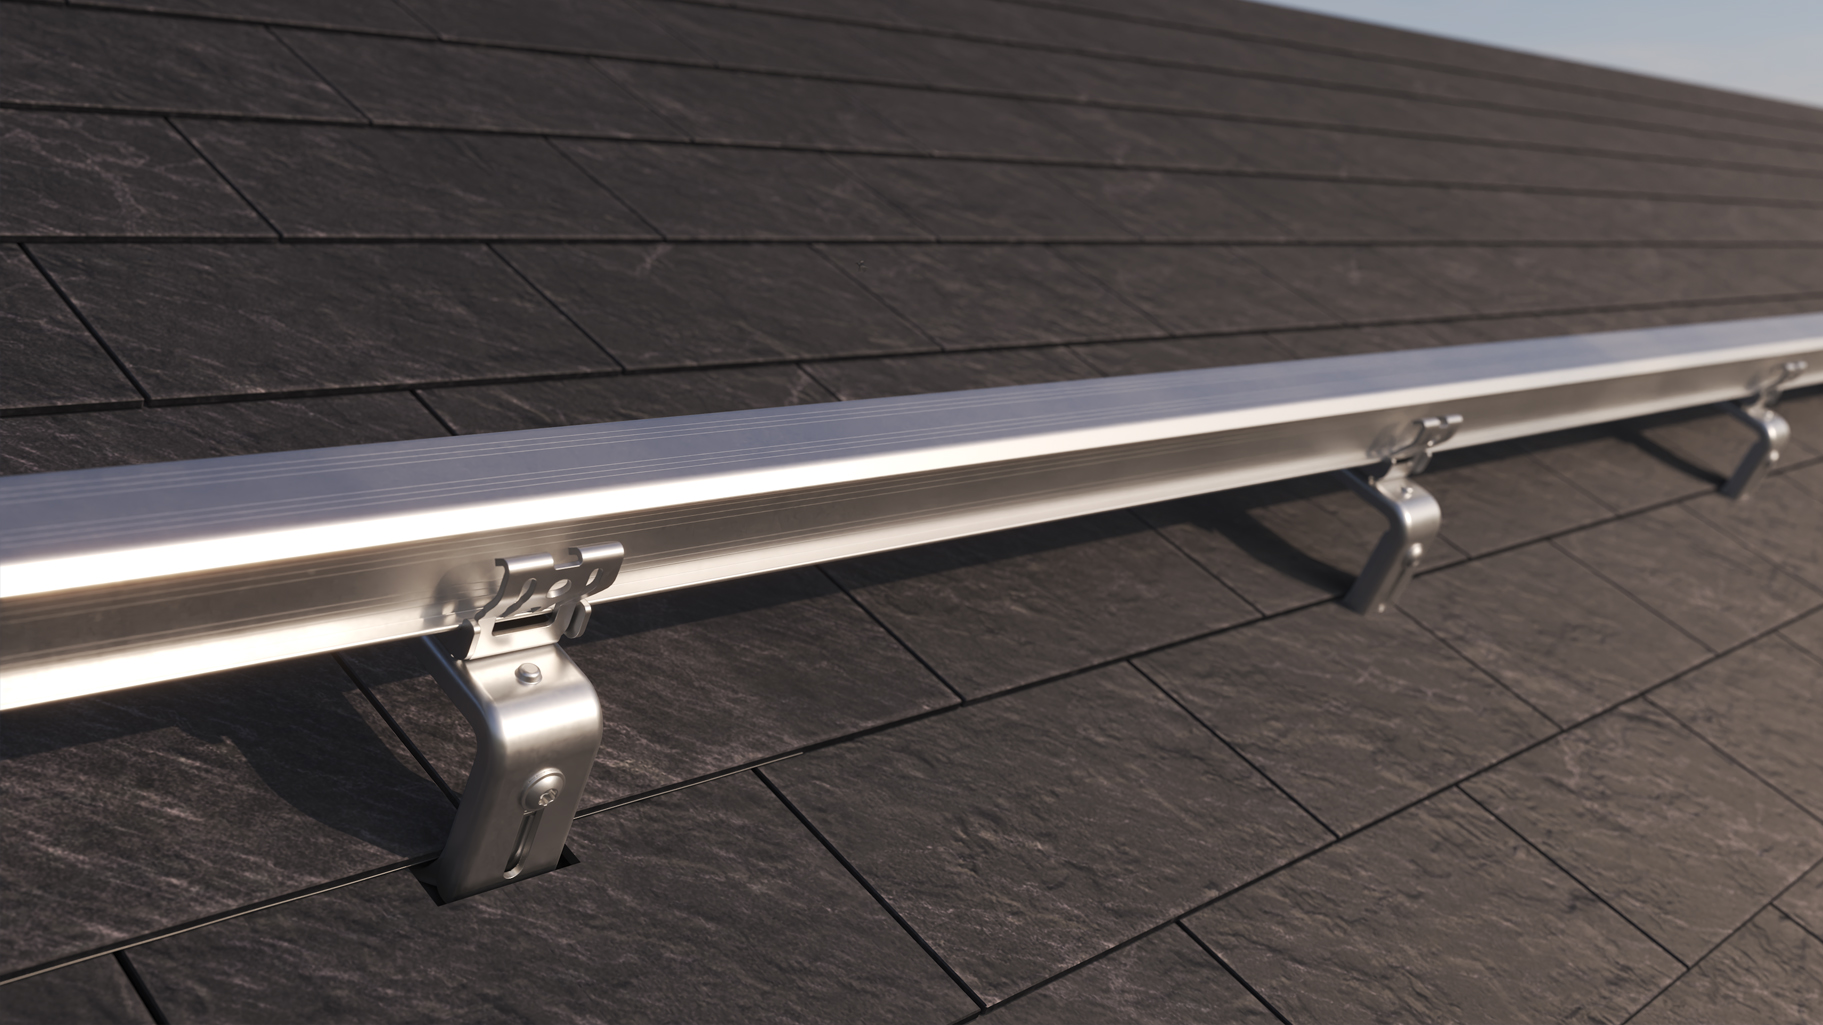
This smart solar panel mounting system consists of our four base ClickFit EVO components; a slate hook, rail, module clamp and end-cap. The slate hook is very thin, only 4 mm, so it can be mounted under the slate. To make installing simple for you; when mounting on a solid substructure or rafters, with the slotted hole you can offset the second screw, reducing the risk of splitting the underlying batten.


Please contact an experienced slate roofer when installing solar panels on slate roofs. Reassuring the slate roof is waterproof again, is a specialist job.
Choosing Esdec means receiving support throughout your entire solar project. We support our solar professionals and remove as much of the hassle as possible. For example, you can quickly make a calculation using our calculator and we also offer free training courses and webinars.


The ClickFit EVO slate roof can be used on slate roofs in whith slate tiles which are up to 6mm thick. Thicker tiles are hard to cut and require a different hook shape.
The ClickFit EVO Slate Hook (1008042) has the following dimensions:
– Footprint (LxW): 255mm x 40mm
– It is 30mm height adjustable. The lowest rail mounting position is 81mm and the highest 111mm (bottom of the rail).
– The batten distance range vary from 125mm up to 210mm. Larger batten distances are possible, but require mounting a wooden shim.
The slotted hole has two purposes:
1. It gives some flexibility as to bridge the batten distance and make sure that the mounting screw is a centered in the batten as possible to prevent the batten wood from splitting.
2. It allows you to mount the different mounting screws in a different wooden grain to prevent the wood of rafters or solid boards to split.
The height adjustment of the hook helps to align the mounting rails. Sometimes, roofs are not perfectly flat and that induces tensions and missalignments in the mounting rails and solar panels. With the height adjustment feature of the hook, you can make sure that the mounting rail is clicked on the roof hook without tension and properly aligned.
It is possible to mount the hook on rafters. However, since this hook is meant to be mounted at the same height than the slate tiles, wooden shims would have to be installed in between the rafter and the hook.
With ClickFit EVO Slate Roof you can choose between mounting in either landscape and portrait orientation thanks to the rotatable mounting rail clicker.
To attach an optimiser or microinverter (collective name: MLPE = Module Levelling Power Electronics), you can use our ClickFit EVO MLPE Clip Lightweight or Heavyweight (art. no. 1008067 or 1008068). Note! If you mount the panels with the mounting profiles for steel roof, we recommend choosing the high (optimiser ready) mounting profile. This provides sufficient space between the roof and the solar panels. The MLPE Clip Lightweight is simply clicked onto the mounting profile, providing integrated cable management! Then click the MLPE onto the clip. First you mount the MLPE Clip Heavyweight on the MLPE, after which you mount the clip, with MLPE, on the mounting rail. Make sure the MLPE clip is placed at least 15 cm from the end of the mounting profile. Want to see how it works? Watch our installation demo.
All solar panels in the same row are automatically interconnected thanks to the ClickFit EVO Module Clamp. To bond the entire PV system, you do need to connect each row to grounding separately, because the individual rows are not connected to each other by the mounting system. The earthing conductor (≥Ø 4mm2) runs parallel to the positive and negative conductors and is connected to a separate grounding point of the inverter. If you have any questions about grounding and bonding, please contact our technical experts.
Can’t find your question here? Feel free to contact us by phone at +31 (0)85 162 22 22